How to Ensure Our Mission-Critical WordPress E-Commerce Store Migrates Error-free
When it comes to a well established ecommerce business with a myriad of active systems and integrations, a WooCommerce to WooCommerce migration to a new server may sound like a difficult task. We’ve been there and have the scars to prove it, so we’ve broken down everything you need to know with this full guide. We’ve identified 9 steps and linked several migration tools and additional resources to help you migrate ecommerce sites confidently and efficiently from start to finish.
Step 1: Set the Date for the Big Migration:
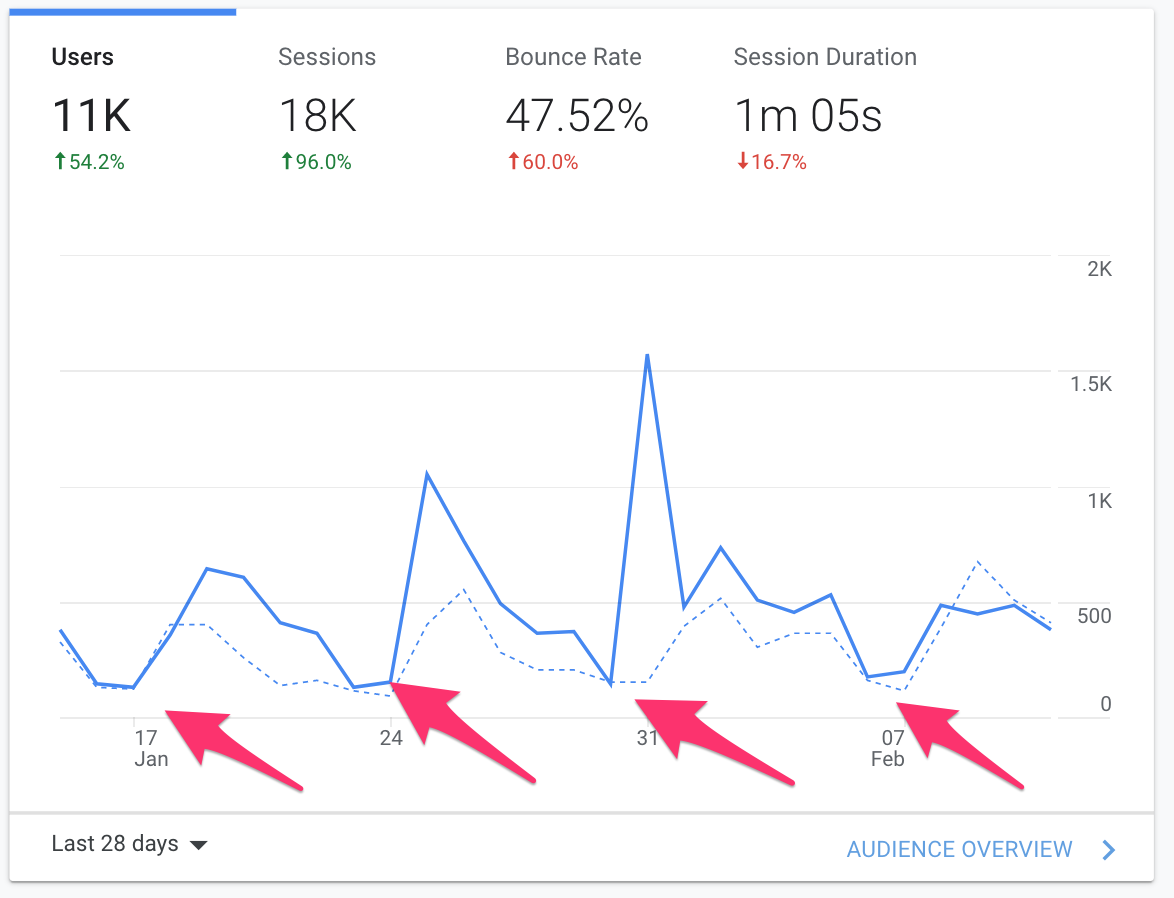
In Google Analytics (or other analytics service) check the last couple of weeks of traffic on your site to identify a day of the week that is the most suitable for the migration to occur. Migrating a WooCommerce site means that you’ll need to set a time for the current site to be under “scheduled maintenance” so that no new orders come in during the process of migration. You’ll want to plan for a time that has historically lower traffic. It’s also helpful to schedule it towards the beginning of your work week We discourage migrations right before the weekend or a holiday.
You should also let other people in your organization and/or your client know well in advance when you plan to do the migration. Let them know that…
- All your data will be secured by multiple databases, code files, and media backups. (You can provide them with the files if appropriate).
- The site will need to be temporarily set to maintenance mode so that no new data comes through while the migration is ongoing. If data does come through during the migration, another migration would be required to adjust for this “delta” difference between the databases. Order processing will resume after the databases are synced up.
- 3rd party integrations (with shipping, newsletters, and payments) will likely need to be reconnected.
- Quality Assurance is a very important step in this process. It is worth it to do a robust pass through all the functionality. You can assure your client that you and your team will be checking a whole array of items that need to be ported over correctly.
- You should make sure you have a “coming soon” or “under maintenance” page with proper branding before beginning this process. Any of these plugins can get you started.
Download the PDF checklist of all the items you will be verifying.
Step 2: Maintenance and Security Scans
It’s important to do any needed maintenance before the migration because you want your database to be consistent between the new site and the old. Updating plugins, themes and/or WordPress core will often cause your database to prompt an automatic update. If you did that on the new server’s site after the migration and then found an issue all of the sudden, your old and new databases will be different and then you are in a real bind because you can’t compare like with like. So update all software first, update the database and then proceed. Make sure to test functionality before moving on. The Query Monitor plugin is a great resource for debugging functionality issues.
You will definitely want to run a security scan. You don’t want to unknowingly move viruses into your server. You can use an on-site plugin like WordFence to do the scan from your WordPress from the admin panel. You should also use an offsite service such as the free Sucuri SiteCheck. For peace of mind, it’s often worth it to just force reinstall all new copies of the software. WP CLI can come in handy here with commands like wp core update —force.
Step 3: Create Multiple Backups
Migration plugins can be very helpful for creating backups that can easily be migrated, but sometimes if your site is bulkier, they might not do the job. Or they might fail to import on the other end; so just to be safe, create backups with a migration plugin and with the command line. Additionally, if you are using Git version control, make sure everything is pushed up to the repository and the Git status is clean.
Here are some recommended migration plugins to create a full site backup:
BackupBuddy, All-in-One WP Migration, or Duplicator
Terminal command backups:
mysqldump -u USER -p DATABASE --single-transaction > ~/PATH/TO/NEWBACKUPFILE.sql(You will need that user’s database password which you can find in the installation’s wp-config.php)
tar -cvf ~/PATH/TO/NEWBACKUPFILE.tar ~/PATH/TO/WEBSITE/INSTALLATION
Step 4: Create a Clone of the Site on the New Server and Run Preliminary Tests
To reduce the amount of downtime for the site we recommend that you first spin up a clone of the site for testing only. If you feel confident that the two hosting systems are similar you can set the live site to maintenance mode at this step, then there won’t be any database delta to resolve later. Or you could create a staging site on a subdomain to test the setup first. Whichever approach you take, make sure to think it through before you start.
Make sure that your installation uses the same database table prefixes as the old one, as this will help with database synchronization later on. There are plugins that can change the table prefix for you if needed https://wordpress.org/plugins/brozzme-db-prefix-change/ or through the advanced settings of iThemes Security. You could change it in phpMyAdmin, but be mindful that it is not as simple as just changing the database table names because there are references to those table prefixes elsewhere. Ideally, you should set the prefix to be the right ones from the start.
Next, Get the cloned site on the new server up and running. You will still need to do a second database migration (a delta) in order for it to be current with the latest customer orders, but first, we are just checking overall functionality and UX issues.
To do this initial migration you can follow Rodolfo Melogli’s WooCommerce migration tutorial that uses the Duplicator migration plugin: https://www.businessbloomer.com/how-to-clone-migrate-woocommerce-step-by-step/
If your website contains memberships through WooCommerce Memberships, Gray Ayer wrote a comprehensive guide. Gray goes a step further and talks about merging two membership stores into one. There are a lot of useful insights here:
Another option altogether is to migrate the entire cPanel from their former hosting to the new hosting, but this requires a degree of compatibility between the systems. Check with your hosting provider.
Also, be aware that different servers can have different PHP settings or versions.
To see the PHP settings in cPanel go to “Select PHP Version” (aka PHP Selector) and compare the PHP version and the selected extensions with the previous server.

Different servers can also use different caching systems (Memcached vs Redis). Some servers are set up with Litespeed which has a robust plugin integration to manage server caching. Other hosts like SiteGround have a proprietary server caching system (and matching plugin). It’s important to take note of this and test it before going live.
You should also note that cron jobs (scheduled tasks) might be set up on the origin server. If your site is set up to do cron jobs from the server side instead of the wp-cron (which is common in sites with heavy traffic), please be aware that you will need to migrate those cron jobs from the old server to the new server. This is not hard to do, but it is crucial..
As mentioned before you can use a subdomain like stage.example.com to see your clone site and run it through its paces. This is a great time to test how the website is performing on the new server.
You can test page speed with GTmetrix and Google Page Speed. Take note of the speed of the site on the old and new hosting setups. Your client will surely be interested in that difference. If the speed got worse than there might be a setup issue. Calling the hosting company at this juncture could be helpful.
Step 5: Go Time – Set the Old Site to Maintenance Mode to Stop the Checkout Process
Important Note: As discussed before, we recommend that you check in with your client about the needed downtime for this step. Additionally, if you can have other developers in your agency be on call during this time, just in case something goes sideways, we highly recommend it.
Once you are ready to switch to your new live site you’ll need to set it to a maintenance mode with a plugin like Coming Soon by Seedprod.
The goal here is to make the checkout process inaccessible to website visitors so we can pause transactions and other new entries created in the database. This gives us time to sync up the new site’s database.
You’ve already chosen a target time to switch into maintenance mode, but before you do, check the Google Analytics live traffic to see how many people are on the site, and where they are. If anyone is currently on the cart or checkout page, wait until they are finished. The goal here is to avoid aggravating any customers or causing sales to fail. You can notify customers of this upcoming maintenance mode by implementing an alert bar at the top of the page.
If you’re using a subdomain or different domain at your new server, use a plugin like WP Migrate DB Pro so you can easily sync all the database tables from the old site to the new one automatically. Alternatively, you can export the database table with the terminal command we described earlier and import it with this one:
mysql -u USER -p DATABASE < ~/PATH/TO/FILE.sql
It is important to save permalinks twice after this step (this rebuilds the .htaccess file), and to clear all cache (if there are active caching plugins) especially if they have database caching like Memcached. Clear cache before creating a backup and after restoring/syncing the database. Also, set Cloudflare (or any other CDN you are using) to Development Mode.
If in the migration process you are going between different domains or subdomains it’s important to be careful and to double check that the URLs are accurate in the end. Many migration plugins do the search and replace but some do it differently than others. It’s important to double-check. To do the process manually you can use these commands:
WP-CLI command:
wp search-replace ‘//example1.com’ ‘//example2.com’ –skip-columns=guid
(IMPORTANT – This is documentation why that GUID column should be skipped https://wordpress.org/support/article/changing-the-site-url/#important-guid-note)
If you are working with subdomains like stage.example.com that are different between installations you’ll want to make sure that:
- //stage.example.com gets searched and replaced with //example.com
- The file path gets adjusted to the new file path
- Watch out for emails. You don’t want [email protected] adjusted to [email protected]. Some migration plugins might adjust those emails without your knowledge so watch out for that. These could be hiding in the HREF address as well as the displayed email.
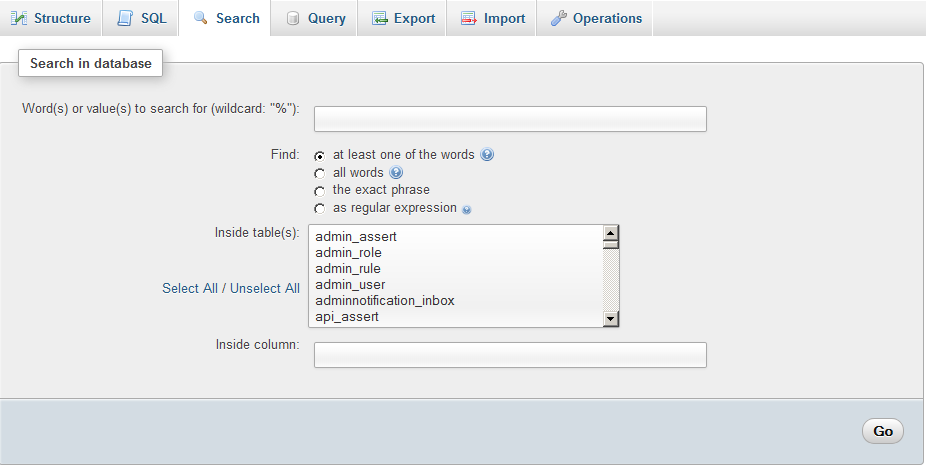
To double-check your work you can use phpMyAdmin (through cPanel) and its search tool:
- Select a particular database (not an individual table).
- Click the ‘Search’ tab
- Enter the old domain as a search term (f.e. stage.example.com)
- Select All (tables)
Step 7: Check Users, Orders, Products, Checkout Process, All Website Pages, Broken Links and Other Critical Functionality Before You Go Live
Check Users
- Do you have the same number of users?
- Do they have the same IDs (You can check this in the wp_users table in the new database)
- Are their passwords the same? (You can check this in the wp_users table. You won’t be able to see the decrypted password, but you can check to see if the encrypted text is the same. Obviously, it would be excessive to do this for every user but you can check a sample.)
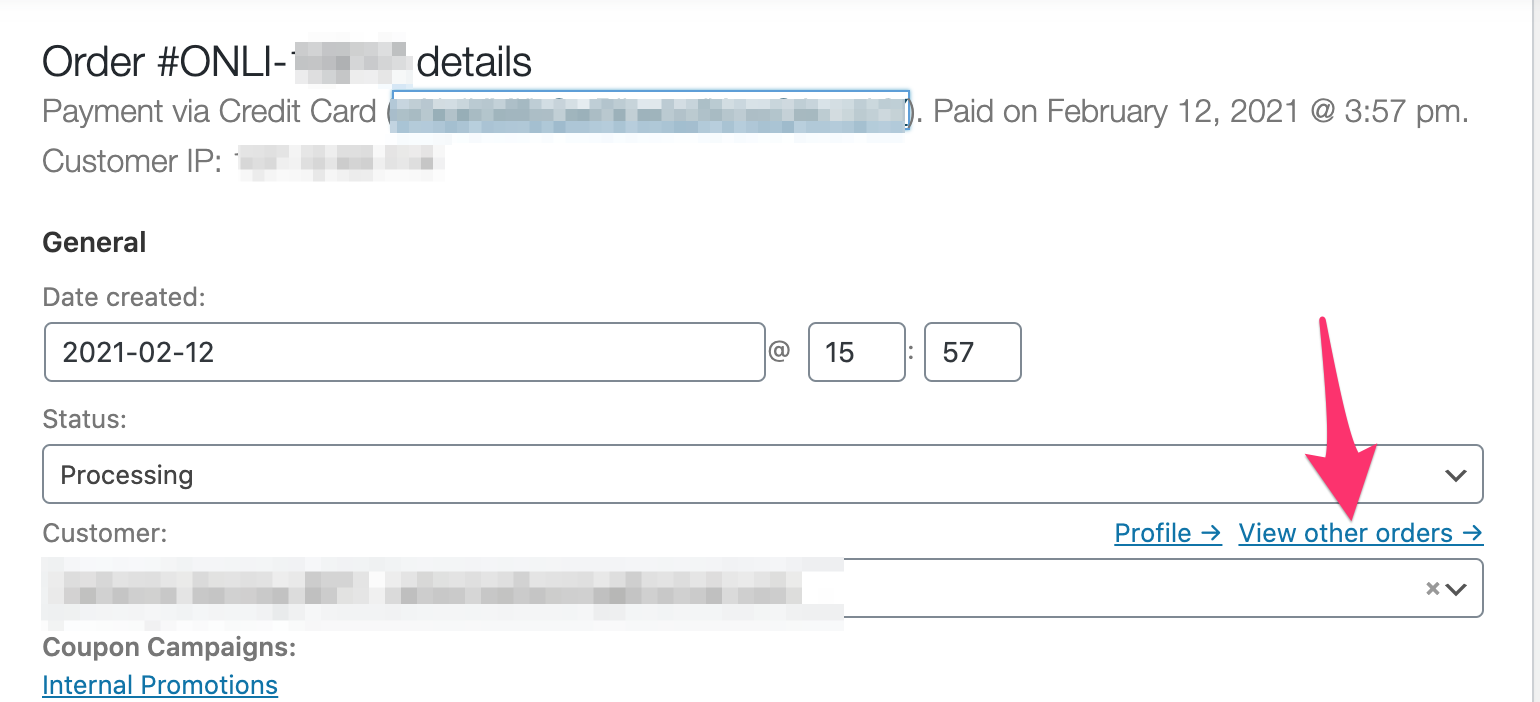
- If you go to an order (WooCommerce > Orders ) that is assigned to a user (not a guest) click on “View other Orders” to check if the other orders belong to this user. Check a few users.
Check Orders
- Do you have the same amount of orders as the current site?
- Are the orders assigned to the same users?
- Run a transaction.
- Does it go through?
- Do the order numbers increase sequentially as you’d expect?
- Are the test orders showing up in the payment processing service?
- If the site has scheduled transactions, are those occurring on their regular schedule? To bump this up, you can always modify these through WooCommerce > Status > Scheduled Actions. This is useful if an action would occur so soon that a customer wouldn’t notice if you process something like a renewal a few hours earlier in a day.
Products
- Do all the products appear as expected?
- Is the inventory of the products being adjusted?
- If there is an inventory management software, is that also being synced? (This might need to be tested after the DNS changes have been made.)
- Check product reviews are working as expected.
- Also check product names, product variants, product types, and product SEO URLs are working as expected.
Checkout Process
- Can you purchase a product with each of the available processing options?
- Is the error handling working as expected?
Coupons
- Are coupons and/or store coupons working as expected?
Check all pages
Tip: Open a new incognito browser window, go to the homepage and control-click on all the pages of the site to open them in different tabs.
- Check all the pages and make sure nothing is broken.
- Check mobile, tablet, and desktop views.
Check for broken URLs
- Leverage an SEO tool like Screaming Frog SEO Spider to crawl through your site’s links and search for broken URLs and to test for links that point to old URLs.
- Some plugins like WPBakery Page Builder will store link URLs with escape symbols that might be missed by a search and replace operation, so checking with a tool like SEO Spider can really save you some grief.
Check Contact and Newsletter Signup Forms
- Can you fill them out?
- Do the entries get stored?
- Do the automated emails go out and arrive as expected?
- Is your newsletter provider authenticated with the new website?
- If you’re using a new domain, have you added the appropriate SPF/DKIM records?
Once this has all been tested it’s time to flip the switch and go live. This will mean changing the DNS settings in the domain registrar (or CDN service) to the new website. Depending on the situation this will mean changing the nameservers or if you are using a CDN like Cloudflare changing the A, SPF, and or CNAME records to point the site (and if applicable email signatures) to the new domain.
Step 8: Check Integrations
Finally, let’s check how integrations are functioning. Oftentimes you’ll need to reconnect to the integration service to establish a new API key. For this reason, it is important to test these all promptly after you go-live. If you can test before going live effectively that is preferential. Unfortunately, that is not often possible since the integrations need to communicate to your actual site.
- Check Google Analytics is tracking data.
- Check that the robots.txt file is allowing crawling on the live site and NOT on the staging site. This is very important for SEO.
- Check Google Search Console is indexing as expected.
- Check SMTP email service.
- Check Newsletter (like Mailchimp) Integrations.
- Check Other/API services (like inventory management, and fulfillment services).
- Check all other domains. Are they redirecting to the new server?
- Check contact forms and any connected CRMs (like Hubspot f.e.).
- Check that emails with your site’s domain haven’t been incorrectly migrated to use a subdomain instead of the actual domain of the site. (@stage.example.com instead of @example.com). Some places to look for this are in the WordPress administration email address in settings and email notification fields in plugins like GravityForms or WooCommerce.
- Check integrations that are setup with custom code modifications.
Step 9: Check Again
Within 24-48 hours check the items from steps 7 and 8 again. The time spent ensuring everything is still going as expected is worth its weight in gold in terms of ensuring that no costly issues are occurring. Ask your collaborators, project managers and/or client to keep their eyes peeled as well just in case there’s an unexpected issue.
It’s important to make sure the website load times and bounce rates have not increased. If anything you should shoot to see an improvement in those areas. You can check bounce rates with Google Analytics and the performance with Google Page Speed.
Final thoughts
Performing migration services can be stressful, that is just the way it is. It’s important to not underestimate issues that could come up. Better safe than sorry is the name of the game. It’s important to think each step through before taking action and use checklists to ensure all steps are taken in the right order.
Download the PDF checklist of all the items you will be verifying.